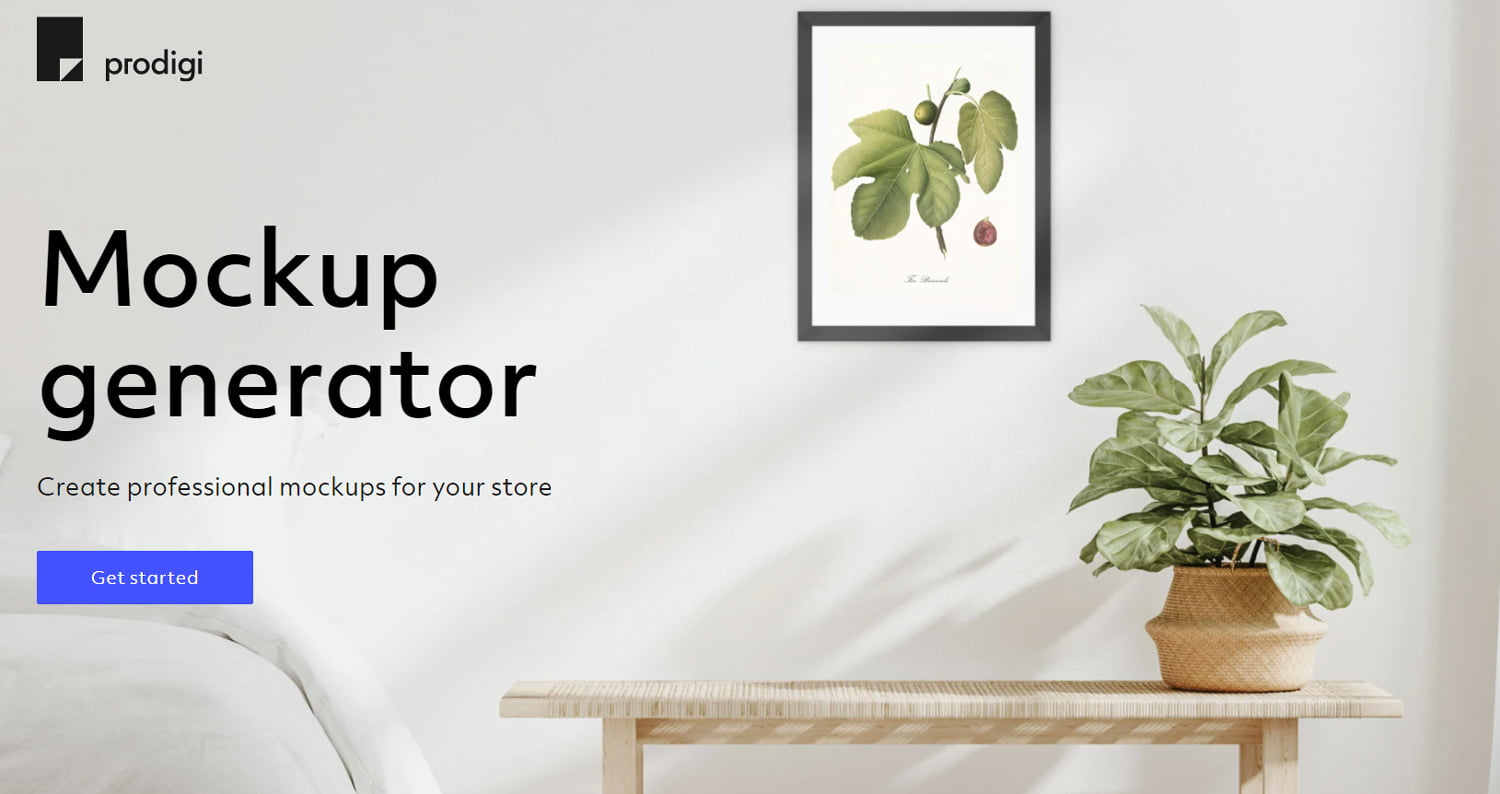
Optimise your promotions with the Prodigi mockup generator
Tags
Interested in joining the world's leading print on demand platform?
In many previous blog posts, we’ve laboured the impact of great mockups. Showcasing your print on demand products in their best possible light is not only critical for conversions, but also helps boost your brand credibility too.
It stands to reason of course that great imagery will increase your ecommerce sales. The more appealing your merchandise looks, the more prospective customers you’ll attract: and ultimately sell to. Indeed, 90% of online buyers state that image quality is the most important factor in an online sale.
It’s for this reason we’ve developed a new, free to use tool to help promote your products online.
Our mockup generator allows you to create custom product previews for your online store in a matter of minutes. It’s easy to use and gives unlimited possibilities for promotion across all your advertising channels.
In this guide we’ll talk you through using the generator, step by step.
How to create a product mockup
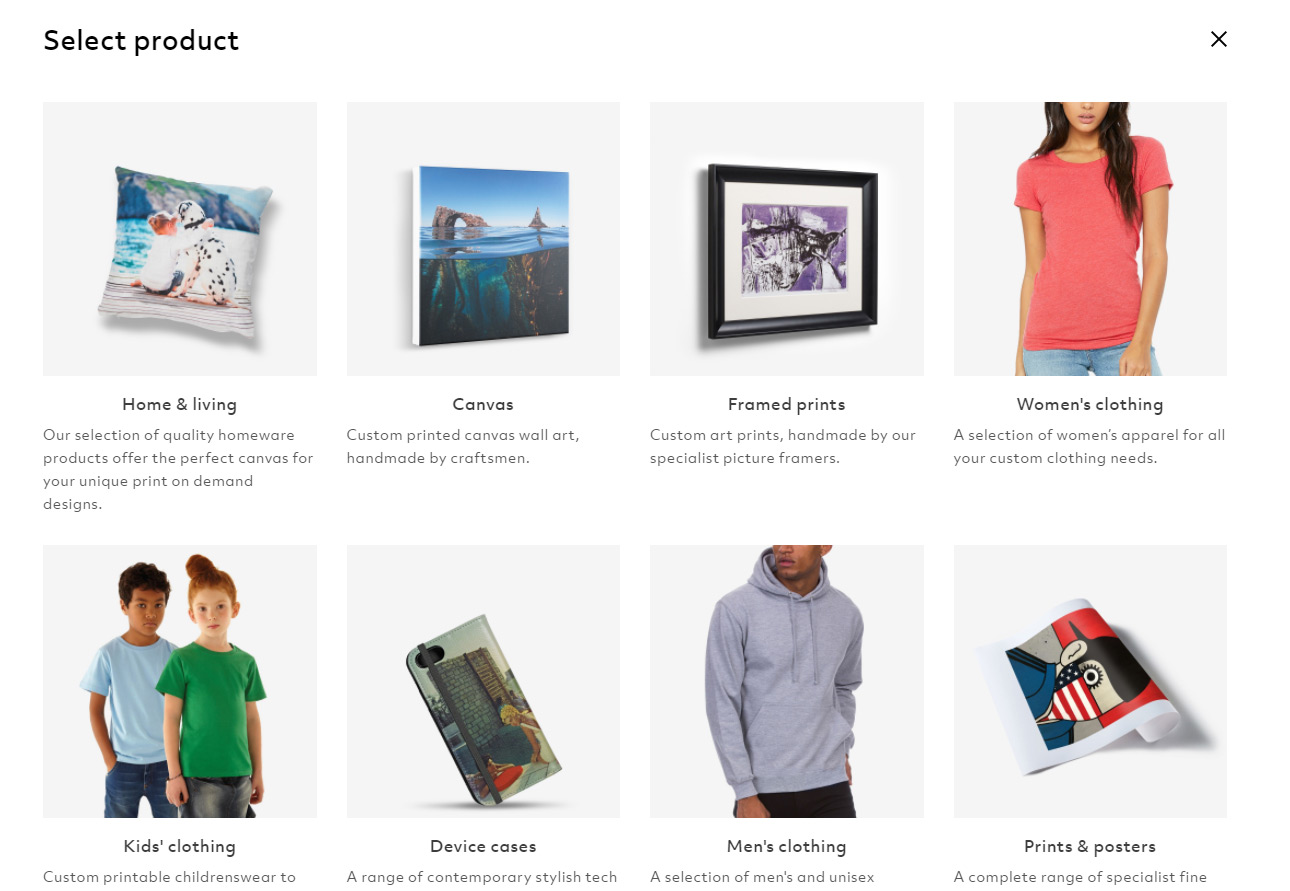
Step 1: Getting started
Visit our generator at https://mockups.prodigi.com.
Simply click the ‘Get started’ button and you’ll be directed straight to the product selection page.
Here you can browse our featured core products, then select the items you wish to preview first.
Step 2: Upload your image
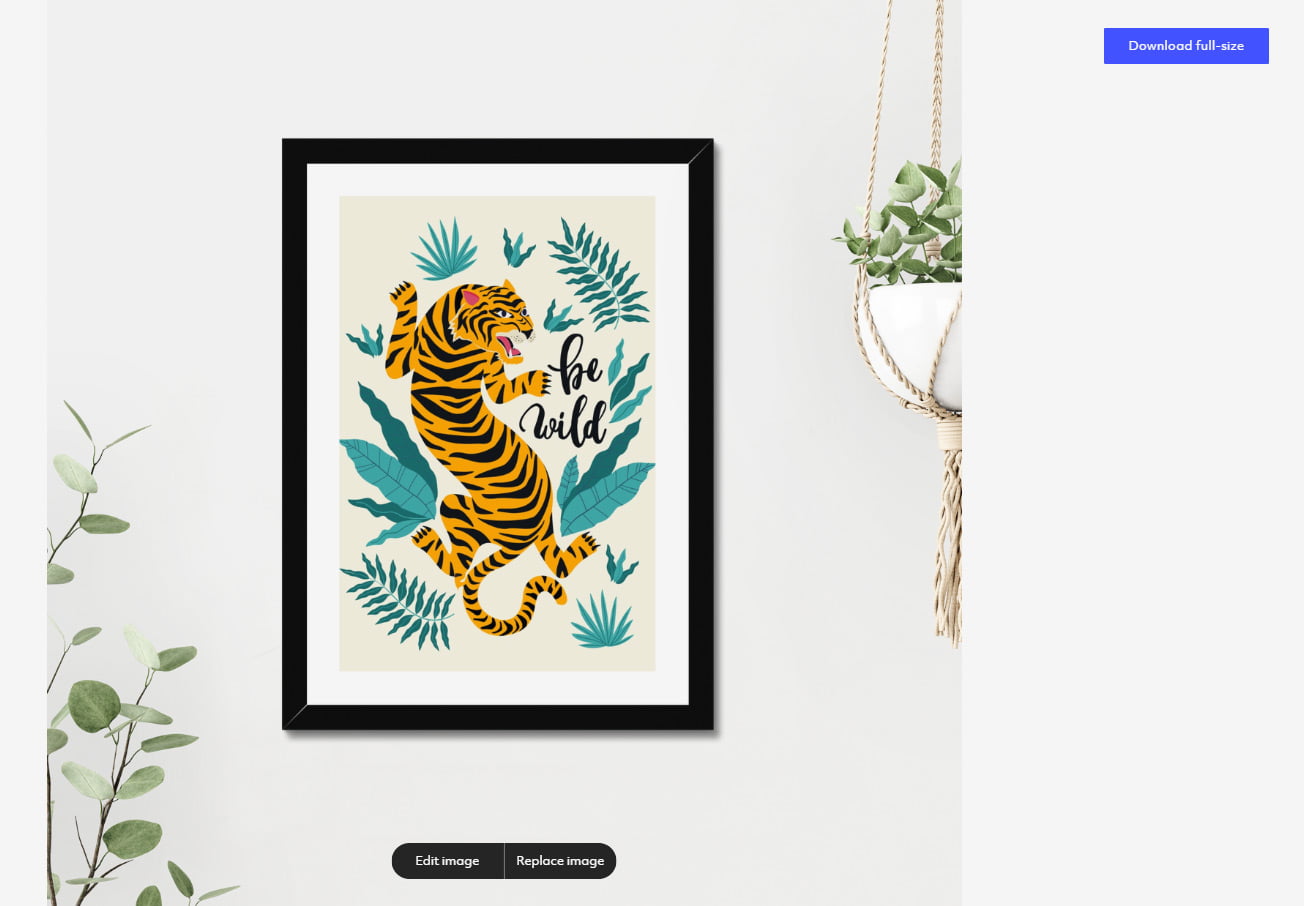
Here we’ll use framed prints as an example. Once you make your selection, you’ll be taken to an editing screen, where you’ll be prompted to begin by uploading your artwork. Select ‘add image’ to do so, or you can simply drag and drop from your desktop.
Below you can see my chosen image, the ‘wild tiger’ has now been automatically generated into a black classic frame preview.
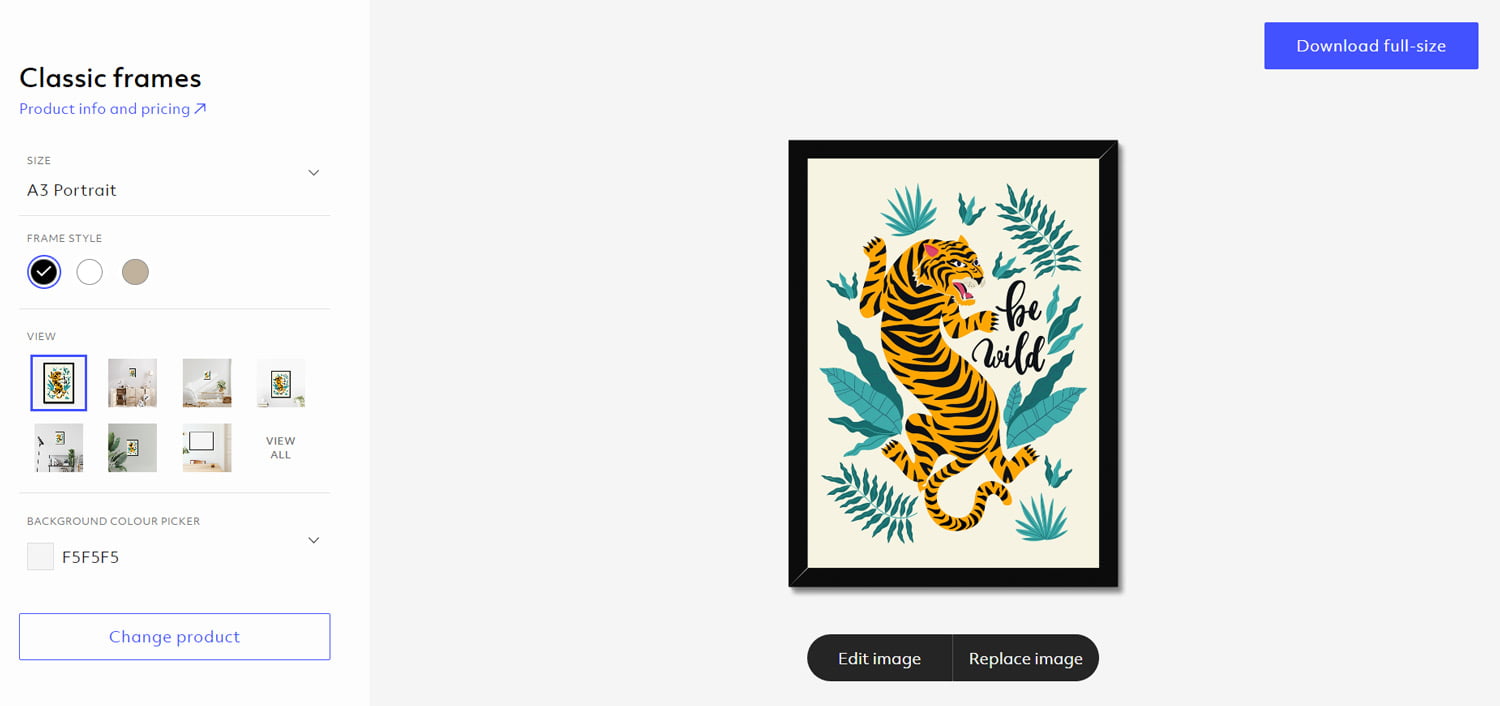
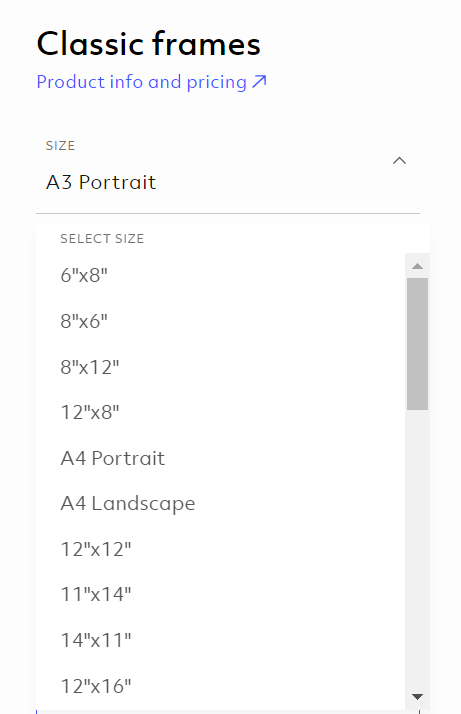
Step 3: Choose your product spec
Using the menu on the left, you can now select your chosen print mockup specification, by size and frame colour. Simply use the drop down options to recreate the product you plan to sell.
Step 5: Edit your image
Once you’ve generated your chosen product, you’ll see that underneath your preview, there’s an option to either replace the image or edit it.

If you hit edit, you can access multiple editing tools, including the option to add a border, or reposition, rotate and scale your image.
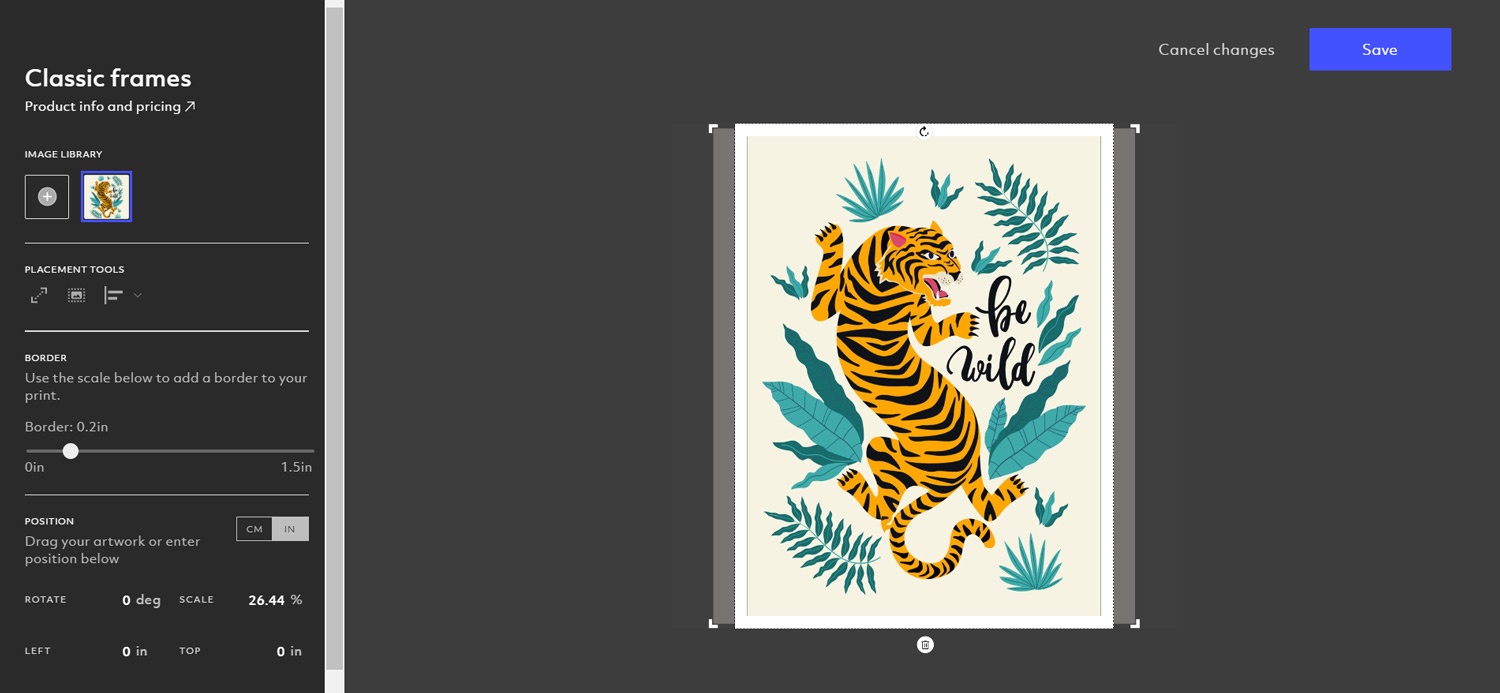
When you’re happy with your finished artwork, click ‘save’.
Now the fun starts!
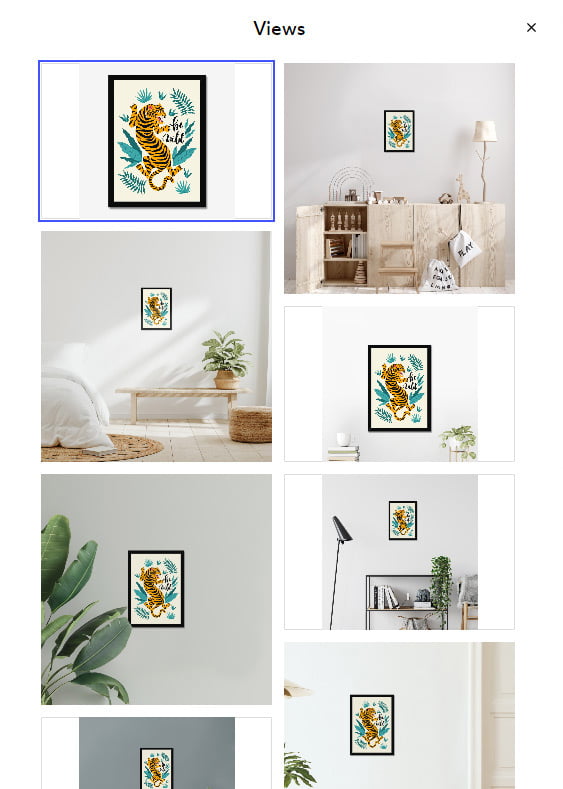
Step 4: Browse the previews
You can now browse a selection of mock ups, including standard product plus lifestyle shots.
For the standard cutouts, you’ll see you have an option in the menu to specify any background colour too.
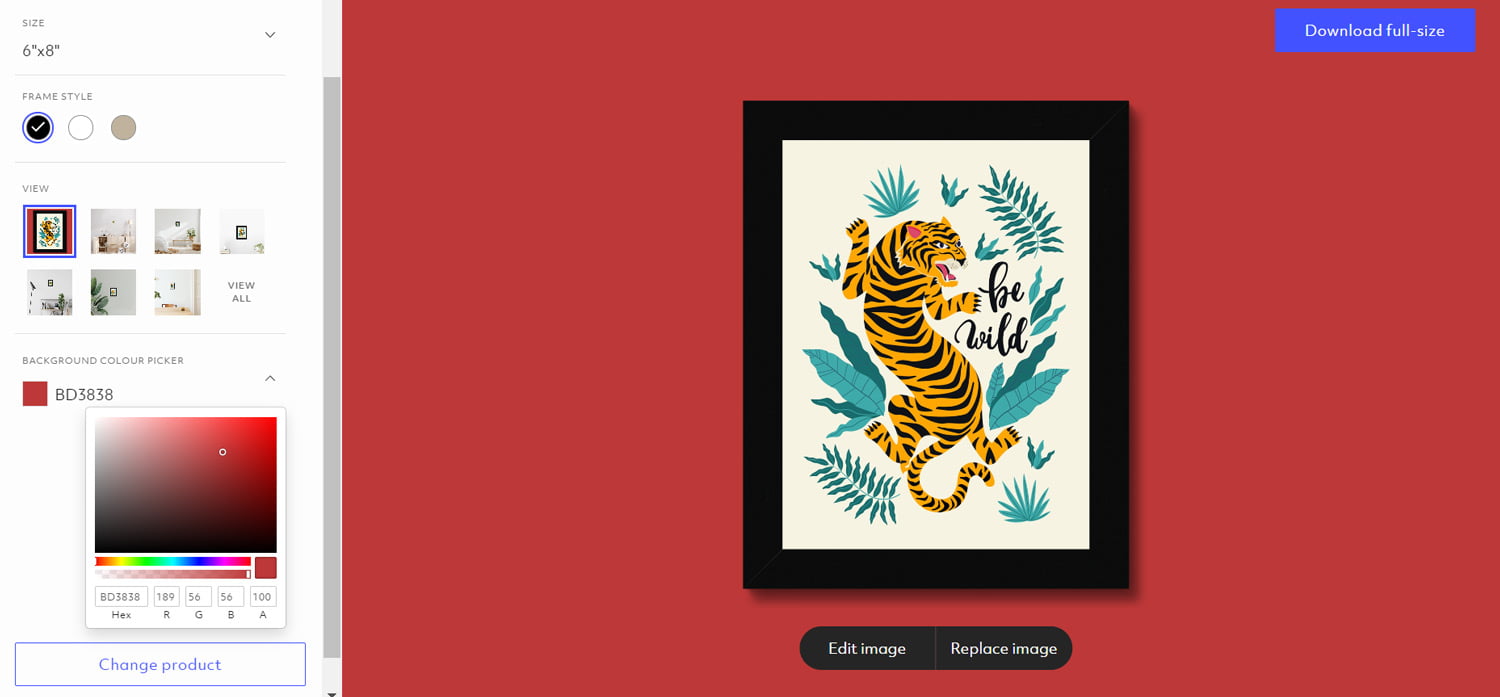
Step 5: Download your high resolution files
Each mockup you create can be downloaded as a high-resolution image, simply click on the ‘Download full-size’ button in the top right of the screen.
Your finished mockup will save as a high-resolution png file, and is now ready to use!
Viewing your artwork on multiple products
If you want to see your artwork on multiple products, no problem. You can change your product selection at any time by clicking the ‘change product’ button in the bottom left of the screen. As soon as you select a new item, your artwork will be automatically placed on the product.
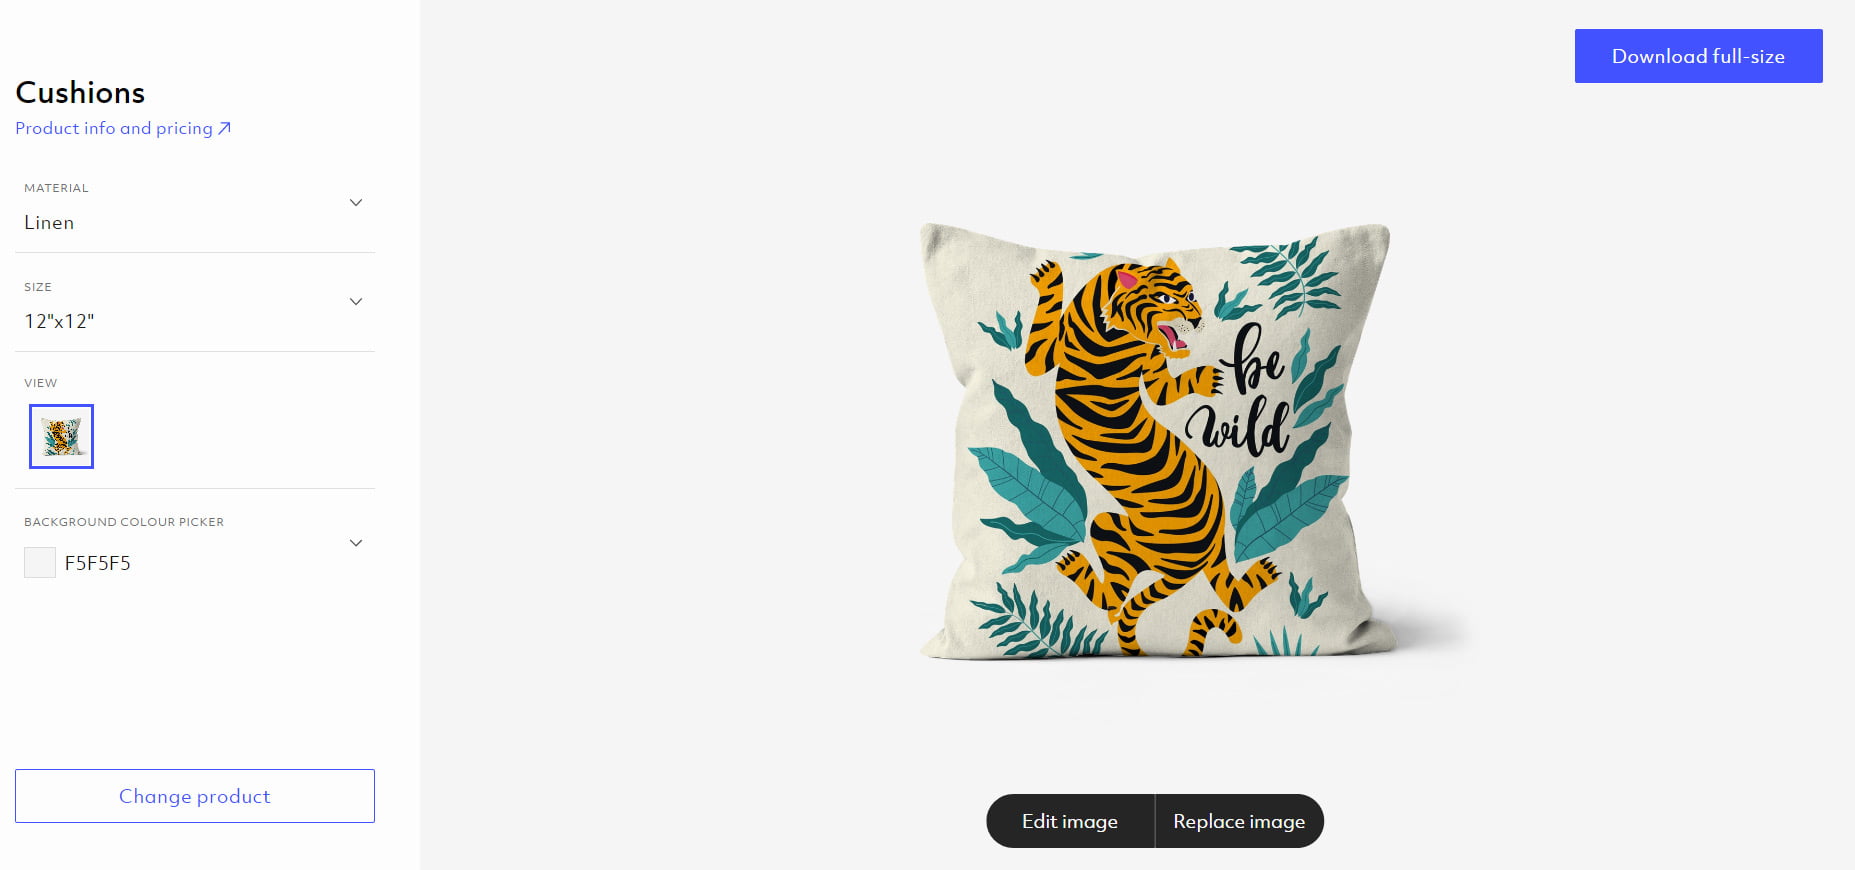
Here we can see our ‘wild tiger’ design on a linen square cushion…
…and an iPad case!

The possibilities are endless!
You can access our mockup generator tool as many times as you like, and download an unlimited number of royalty-free images for any advertising or promotional purpose you wish.
We’ll be constantly updating our library, so each time you visit there’ll be ever-increasing options for new product previews.
Upload your first image and start creating product mockups for your store today.
Further reading
-
Getting your print on demand store all set for summer
9 April 2021
-
7 ways to differentiate yourself from other print on demand retailers
18 June 2020
-
Marketing for print on demand businesses — what's your story?
16 September 2020
-
Ankorstore X Prodigi: Boost your brand in Europe
4 August 2022