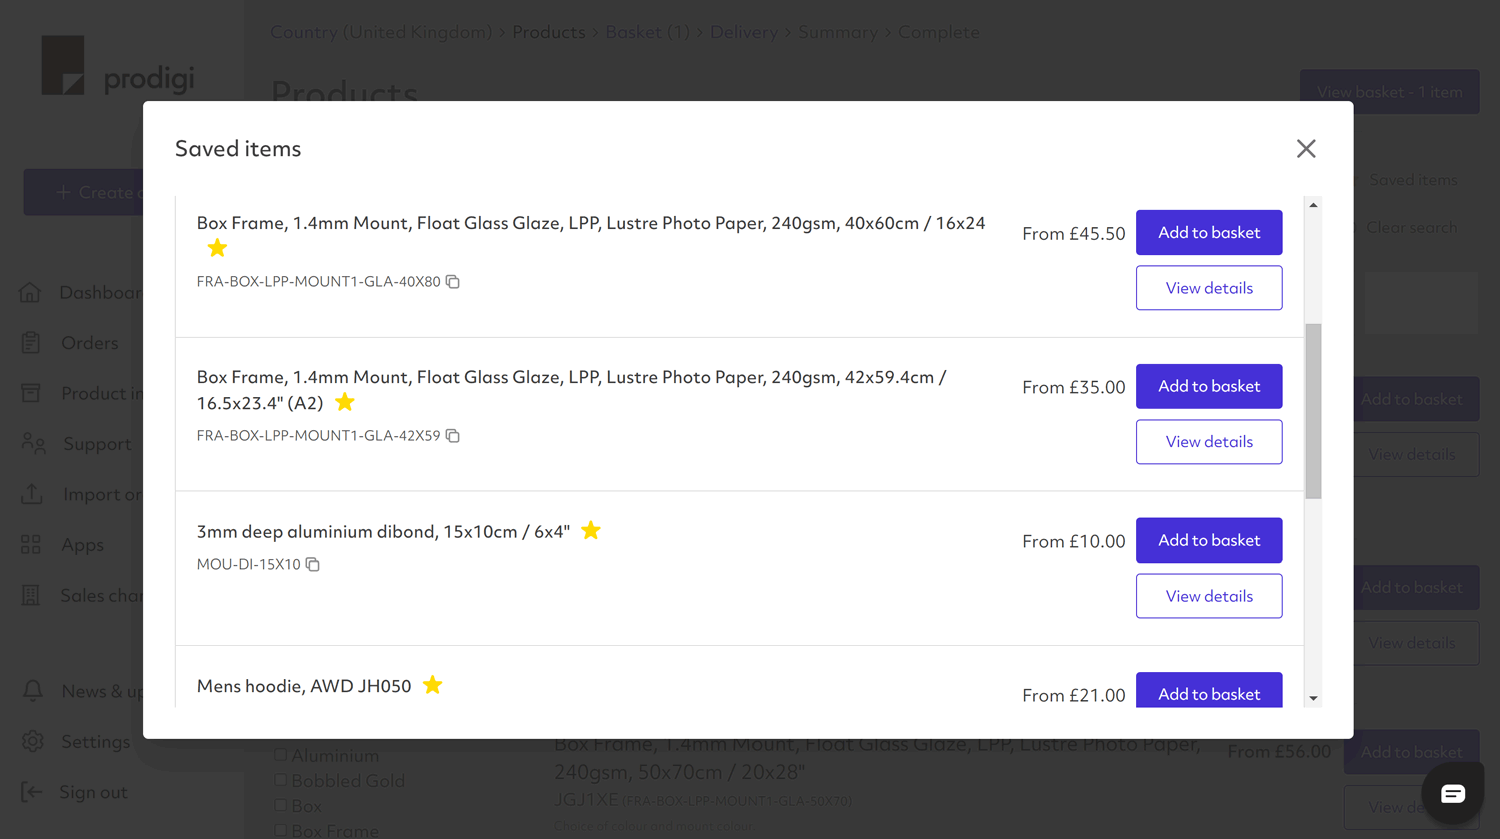
Prodigi dashboard update: Saved Items

Tags
Interested in joining the world's leading print on demand platform?
Don’t you just hate it when you can’t find what you’re looking for? We feel the same way, which is why we’ve introduced our new Saved Items feature for merchants placing orders through the Prodigi dashboard, including via our manual order form and sales channel integrations.
As well as giving you easy access to any print on demand products you’re interested in, this brand-new feature saves manual order form users from having to manually search for individual products and speeds up the product configuration process for sales channel integration users. And with the capacity for storing up to 100 items, there’s plenty of room for all your favourites.
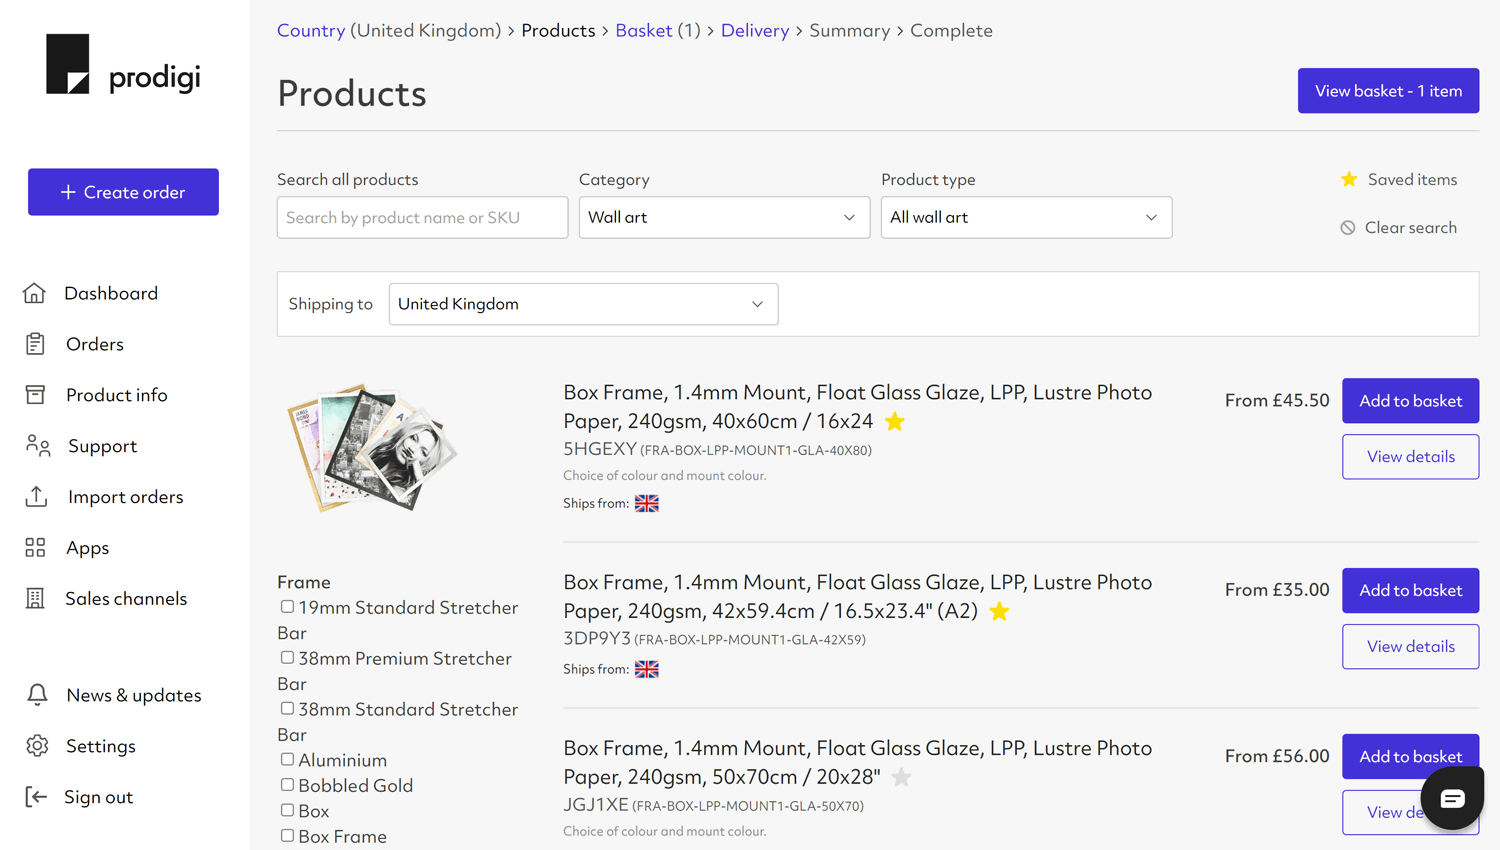
To add products to your Saved Items, search for the desired product in the product search screen, then click on the greyed-out star icon next to it. The icon will then turn yellow, indicating that the product has been successfully added.
To remove a product from your Saved Items, simply click on the star icon again. The icon will then revert from yellow back to grey, signifying that the product has been successfully removed.
You can access your Saved Items in the manual order form or from within your sales channel integration by clicking on the ‘Saved items’ button located in the top right-hand corner of the respective product search screen.
For more detailed steps on how to add products to your Saved Items, please see below.
Manual order form
- Log in to the Prodigi dashboard
- Select ‘Create order’ from the menu on the left-hand side
- Choose your destination country (the location you want us to ship your order to)
- Type in the product you’re looking for or copy and paste a specific SKU
- Click on the greyed-out star icon next to this product to add it to your list of Saved Items
Sales channel integrations
If you already have an existing sales channel integration and would like to configure a new product for automatic fulfilment, please follow the steps below:
- Log in to the Prodigi dashboard
- Select ‘Sales channels’ from the menu on the left-hand side
- Navigate to your store connection
- Click on the product you want to configure for automatic fulfilment, then select ‘Choose product’
- Click on the greyed-out star icon next to this product to add it to your list of Saved Items
If you’re yet to integrate your ecommerce store with Prodigi, you can follow the step-by-step integration process outlined in the relevant user guide. Once you reach the product configuration stage, you can follow the steps outlined above.
Start your own print on demand business with Prodigi. Sign up for a free account and get 50% off your first sample order.
Further reading
-

Our new pricing & shipping tool has arrived
28 September 2022
-
Maximise control & minimise mistakes with our new order pausing feature
2 May 2024
-

Introducing our Etsy dropshipping integration
21 April 2023
-

Prodigi acquires cloud printing platform Peecho
2 April 2024